- Home
- Learn Linux
- Learn Electronics
- Raspberry Pi
- Programming
- Projects
- LPI certification
- News & Reviews

Google Ads
This provides details of how to add printing support using CUPS (Common Unix printing system). Most distributions provide a user friendly interface for adding and configuring printers, but that is not included in the Raspberry Pi on which is what this is based on.
A word of warning Performance can be an issue for printing on the Raspberry Pi, particularly if other applications are running. I did come across some problems during my testing which I was able to overcome by refreshing the SD card image. Some printers that otherwise work on Linux may not work on the Raspberry Pi due to the filter process timing-out during printing.
This is based on the Epson Stylus Photo PX720WD. The manufacturer does provide their own Linux drivers, but in this case I'm installing the standard Linux drivers provided through CUPS.
The first thing is to install the CUPS system
sudo apt install cups
This will take a while as there are a lot of different packages that will be installed, including the different printer drivers for a number of different printers. When finished it will start the daemon cupsd automatically which provides the printer capability.
CUPS uses the group lpadmin to determine who is authorised to administer the printers. You will therefore need to add the lpadmin group to your user to enable you to administer the printers. This can be done by issuing:
sudo usermod -a -G lpadmin pi
Replace "pi" with your own username as appropriate.
The rest of the administration of the printers can be done through a web interface. Connect via web browser on local computer to http://127.0.0.1:631 which is on the local computer. If you would like to administer the printers from another computer (eg. to run this headless as a print server) then you can allow connections from another computer by editing the file /etc/cups/cupsd.conf by updating the Listen entries to permit connections to the IP address of the computer.
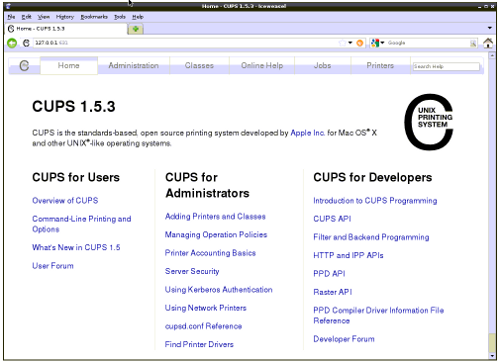
From the main screen choose the Administration Tab and then select "Add Printer"
You will be prompted for a username and password - enter your normal pi username and password, or whatever user you added to the lpadmin group earlier.
CUPS will now search for printers that are locally connected and ones it can see on the network. As you can see on the screenshot below CUPs has found my wireless printer "Epson Stylus Photo PX720WD". In fact in this example it's found it twice which is because I already have another Linux computer running CUPS which can act as a print server. For the purposes of this you can ignore the printer marked "PRINTER1".
Also note that I don't have a HP printer connected to my computer, but it has found the drivers and therefore suggested that as an option. If you have a network printer not shown then you can choose the appropriate network connection and enter the details manually.
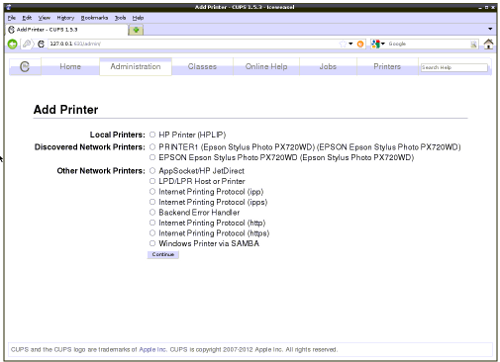
Select the one marked "EPSON" and choose continue
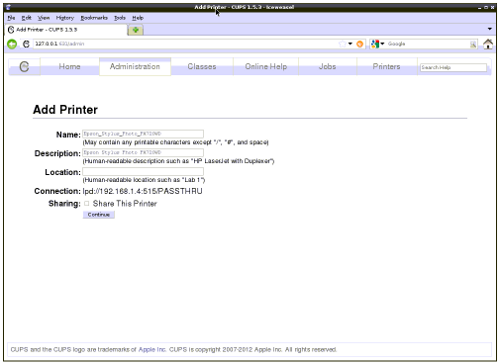
If you only have one printer the fields can usually be left at their defaults. It may be useful to change these if you are setting up a print server for a company network that has multiple printers, or you can change them for your own benefit if you prefer to use a different name.
The one field that you may consider if you have local printer is the "Sharing" option. This is not normally required for a network printer where you can connect direct from the computer to a printer, but it would allow you to share a USB printer across the network if required. This is the reason for the "PRINTER1" showing in the earlier search as it means I can provide printing from outside of the local network using a print server. An alternative is to setup a pass through printer which lets the client handle the print filters.
Choosing continue and it will then take a little while to search for the printer.
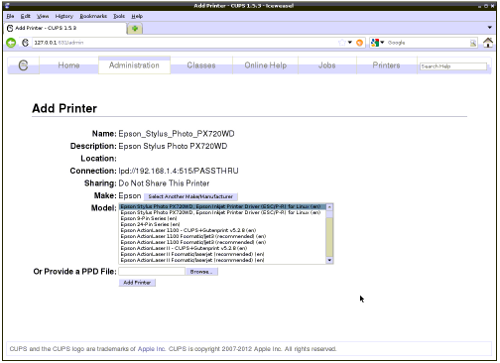
CUPS will then display a list of printers showing the nearest match. For common printer models then there should be, as in this case, an exact match "Epson Stylus Photo PX720WD, Epson Inkjet Printer Driver (ESC/P-R) for Linux (en)". If there is not an exact match then it may be possible to use a similar model although this may not be able to utilise all the features of the printer.
It may also be possible to get a printer driver from the manufacturer. It may be possible to provide the PPD file through this page although install instructions differ for different manufacturers when using 3rd party drivers.
Select an appropriate printer and choose "Add Printer".
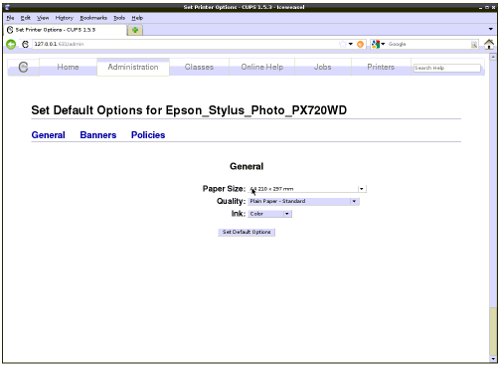
You can then select the default options (eg. paper size), although these can normally be set in the application when printing.
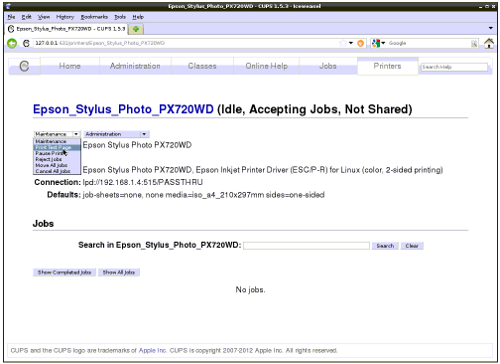
You can then view the printer status and request a test print through the printer tab.
The printer should now show in the print menu of any applications that support printing.
I had a few problems with printing when first trying it out on the Raspberry Pi. I believe this was due to performance issues related to other software running on the Raspberry Pi which resulted in a timeout during the printing. So if you do have problems it may be worth trying after shutting down any unneccessary applications before trying again.
Printing is quite a complex process so it's hard to provide details of what could go wrong and how to fix it - but here are a few pointers.
Other applications - avoid running other applications and daemons when trying to print complex documents.
Be patient - sometimes printing can take a long time. If at first nothing happens wait a while before checking - and don't keep resubmitting until you are sure the previous job has failed.
Error log - printing debug and error messages are logged to the file /var/log/cups/error_log. This can help give a pointer to problems.
Config files - printers added through the cups interface are added to the folder /etc/cups/ppd. The files are text based so it's possible to look through these files for incorrect entries.
Test the filters manually - the commands below will allow you to test your printer filters. Note select the appropriate PPD file for your printer on the first line.
export PPD=/etc/cups/ppd/Epson_1.ppd

/usr/lib/cups/filter/bannertopdf 1 tim '' 1 '' </usr/share/cups/data/testprint >bannertopdf.pdf


## Warning this next entry may cause the Raspberry Pi to hang

/usr/lib/cups/filter/pdftops 1 tim '' 1 '' <bannertopdf.pdf >pdftops.ps


/usr/lib/cups/filter/pdftoraster 1 tim '' 1 '' <bannertopdf.pdf >pdftoraster.ras
Test gs - conversion to / from postscript is often a requirement within the print process. The following command can be used to test that the ghostscript (gs) command is able to handle the conversion correctly.
gs -sDEVICE=cups -dNOPAUSE -dBATCH -sOutputFile=out /usr/share/doc/printer-driver-foo2zjs/manual.pdf
Other sources - below are some useful guides to understanding the CUPS printing. Some of these are for other distributions (but are still mostly valid), and they can be very technical.

