- Home
- Learn Linux
- Learn Electronics
- Raspberry Pi
- Programming
- Projects
- LPI certification
- News & Reviews

Google Ads
The Raspberry Pi Pico is a small inexpensive microcontroller. Unlike the Raspberry Pi computer it does not have a HDMI output, but it can be used to control other displays such as this text based LCD display.

This video is a guide to using an LCD (with I2C module) with the Raspberry Pi Pico.
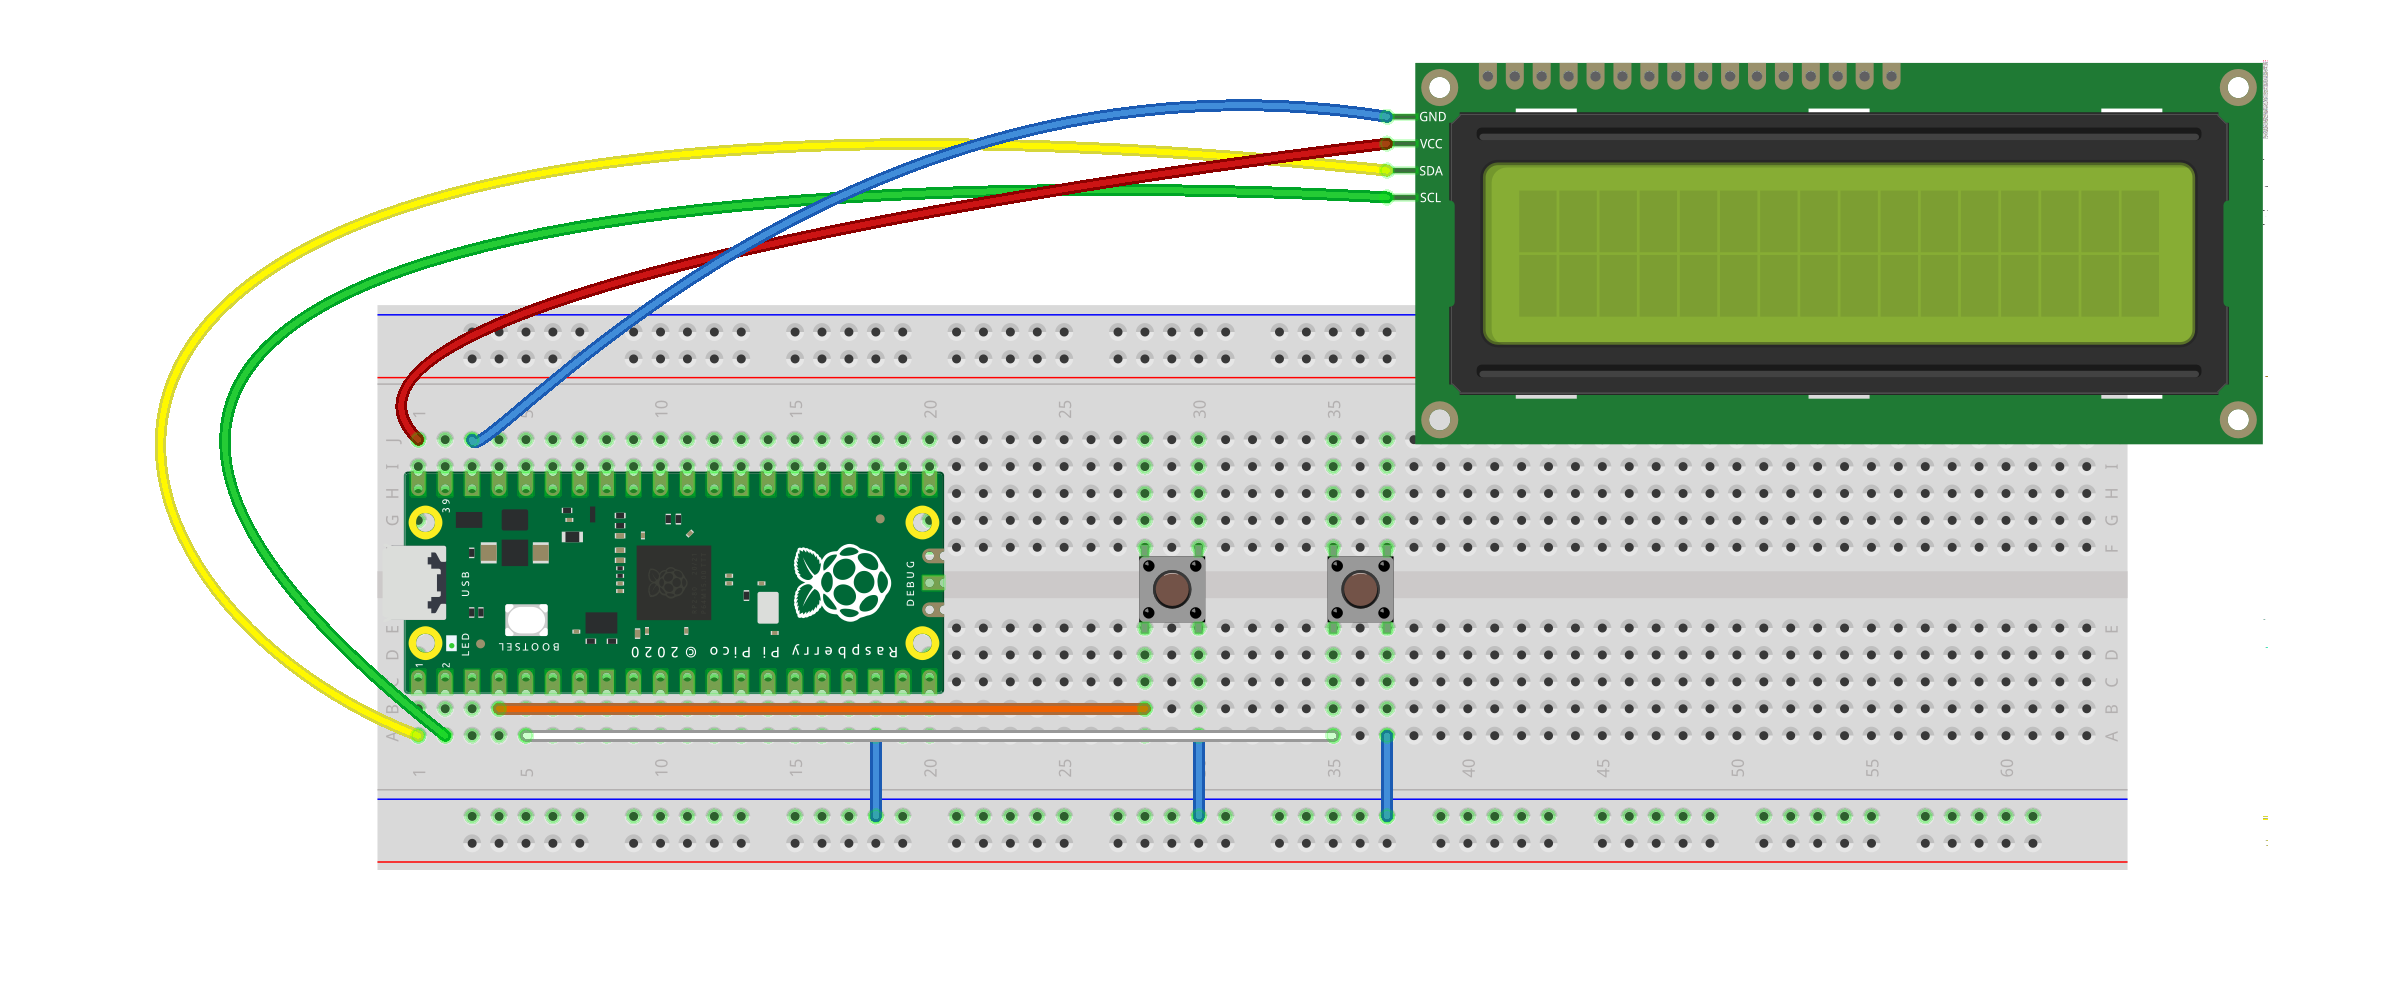
For this example I used a 1602 LCD display. The code refers to 16 characters per row and 2 rows in total. You could use other models such as a 16x4 which would also work.
It is important to get one with an I2C adapter. These are needed because the LCD display takes parallel data and so would use up many of the pins of the MicroBit. The I2C adapter allows you to instead send the data as serial data so needs only 2 pins (plus ground). The image below shows an LCD display without the adapter and one below with adapter. You can buy the adapter separately but that will need to be soldered to the display, whereas it is more convenient to buy them pre-soldered on. The adapters are normally based around the PCF8574 or PF8574A ICs. These normally have I2C address 39 (0x27) for the PF8574 or 63 (0x3F) for the PF8574A. If you want to connect multiple devices then you can change the address using solder pads on the bottom of the board.
I have created a separate guide which explains what I2C is and how it can be used.

The diagram below shows how the circuit is wired up. As you can see it is very simple. The LCD display has 4 connections. Two are used for the power which are connected to a 5V power supply (VSYS) and ground. The other two are for the I-squared-C bus which has a serial data port (SDA) and a serial clock port (SCLK).
Click the image for a larger version.
The MicroPython libraries needed for controlling the LCD are provided below:
These files need to be downloaded to the Pico. This can be done by loading them into the Thonny editor and choosing "Save As". When prompted choose the Raspberry Pi pico as the destination.
This is the source code required. If you would like the code to run automatically whenever the Raspberry Pi Pico is powered on then it should be saved as main.py.
import utime

import math

import machine

from machine import Pin

from machine import I2C

from lcd_api import LcdApi

from pico_i2c_lcd import I2cLcd


I2C_ADDR     = 0x27    # Decimal 39

I2C_NUM_ROWS = 2

I2C_NUM_COLS = 16


SDA_PIN = 0

SCL_PIN = 1


PLAY_PIN = 2

RESET_PIN = 3


print("Running StopWatch")

i2c = I2C(0, sda=machine.Pin(SDA_PIN),

    scl=machine.Pin(SCL_PIN),

    freq=400000)

lcd = I2cLcd(i2c, I2C_ADDR, I2C_NUM_ROWS, I2C_NUM_COLS)


button_play = Pin(PLAY_PIN, Pin.IN, Pin.PULL_UP)

button_reset = Pin(RESET_PIN, Pin.IN, Pin.PULL_UP)


lcd.putstr("Stopwatch")

utime.sleep(2)

lcd.clear()

lcd.hide_cursor()

timer = 0

running = False


lcd.clear()

lcd.putstr("Stopwatch")


while True:


    # If button pressed then toggle

    if (button_play.value() == False):

        running = not running

        print ("Status "+str(running))

        # sleep prevents single press

        # causing multiple play / pause signals

        # this is a simple, but basic method

        utime.sleep(0.5)

    if (button_reset.value() == False):

        print ("Reset")

        timer = 0

        lcd.clear()

        lcd.putstr("Stopwatch")

        utime.sleep(0.5)


    lcd.move_to(0,1)

    lcd.putstr(str(math.floor(timer)))


    if (running):

        timer += 0.1

        utime.sleep(0.1)
In the video above I explain about how this works and the reason for the sleep statements. This is a simple way to deal with the problem of multiple button presses, but there are better ways.

