- Home
- Learn Linux
- Learn Electronics
- Raspberry Pi
- Programming
- Projects
- LPI certification
- News & Reviews

Google Ads
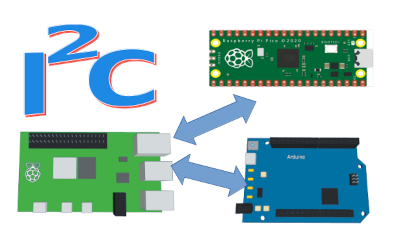
In this page I'll show how you can communicate between various devices using I2C serial communications. The example shows a Raspberry Pi as the controller and a Raspberry Pi Pico and an Arduino as peripheral devices.
I2C (or I2C as it's commonly written) is an abbreviation of Inter-Integrated Circuit. It was created by Phillips Semiconductor as a way to communicate between integrated circuits needing minimal connections. It is a common protocol often used for connecting devices to a computer or a microcontroller.
I2C is a serial protocol, which means that data is sent one bit at a time down a wire. Unlike the serial protocol used for USB which is asynchronous I2C is synchronous. It's also a bus technology which means you can add multiple devices on the same serial ports.
I2C is sometimes referred to as a Master, Slave relationship. This is now considered by many to be inappropriate as it is trivialising the suffering of slaves both historically and through modern day slavery affecting vulnerable people around the world. In addition the terminology isn't always correct.
I will therefore be using the terms controller to indicate the computer that is controlling the I2C bus, and peripheral device to indicate the device that the controllers communicates with.
In and earlier example I showed how serial communications can be handled over the USB or serial ports on the Raspberry Pi and Arduino. That is the easiest way to connect one pair of devices.
The advantage of I2C (and SPI) is that you can control multiple devices through one bus. It can also be faster. It is however a little more complicated to understand and code.
The main difference between SPI and I2C is that I2C needs only two wires (plus ground) whereas SPI needs 4 and an additional enable port on the controller for any additional devices. Some other differences are covered in more detail in the video above.
I2C is implemented using open drain connections. This means that pull-up resistors are needed for both the SDA (data) and SCL (clock) lines. These are typically between about 2kΩ and 5kΩ.
If using different voltages, then it is important not to allow a 5V signal (eg. Arduino) to go to a device for 3.3V (eg. Raspberry Pi or Pico). This can be achieved by connecting only to the 3.3V supply, but I recommend instead using a 3.3V to 5V MOSFET logic level shift circuit for voltage protection.
Each peripheral must have a unique address. These are sometimes created in software and sometimes in hardware:
Software (used here allows for flexibility)
DIP switches / jumpers (limited address range, but good flexibility
Solder pads / tracks (difficult to change more than once
Fixed address (no flexibility - not recommended).
The Raspberry Pi computer and Raspberry Pi Pico microcontroller both work at 3.3V. This makes connecting them together easy using:
SDA - Raspberry Pi GPIO 2 to Pico GP2
SCL - Raspberry Pi GPIO 3 to Pico GP3
Gnd - Raspberry Pi Gnd to Pico Gnd
Warning! The Raspberry Pi and Arduino work may work at different voltages.
The I2C ports on the Raspberry Pi are 3.3V only. They can be damaged by if a peripheral device pull-up resistor raises the bus to 5V. If connecting to a 5V device then a level shifter is recommended. The following can be used from a Raspberry Pi to an Arduino:
SDA - Raspberry Pi GPIO 2 to Arduino A4
SCL - Raspberry Pi GPIO 3 to Arduino A5
Gnd - Raspberry Pi Gnd to Pico Gnd
I had some difficulties with getting I2C working due to differences in the implementations of I2C. In particular the Python that I used on the Raspberry Pi is for SMBus (System Management Bus) which is based on I2C but not the same. I needed to use different methods to retrieve data from the Pico compared to the Arduino. In both cases I only transferred data to the peripherals 2 bytes at a time, and retrieve data 2 bytes from the Pico and 1 byte from the Arduino at a time.
The code is available to download below.
These projects use I2C
Please view the copyright information regarding use of the circuits.

