- Home
- Learn Linux
- Learn Electronics
- Raspberry Pi
- Programming
- Projects
- LPI certification
- News & Reviews

Google Ads
If you are looking for a robust, DIY electronics solution to throw your track turnouts, this Raspberry Pi Pico W point controller board is exactly what you need. Built specifically to handle the high-current demands of model railway solenoids, the core of this project is a custom circuit board featuring an integrated Capacitor Discharge Unit alongside efficient MOSFET switches. Capable of driving up to four points on an OO/HO layout—and easily adaptable for other setups, this system bridges the gap between physical hardware and digital control, allowing you to trigger your points via Wi-Fi, a computer GUI, or a physical switch frame.
This project provides a way to control model railway points (model railroad switches / turnouts) using a web interface on a Raspberry Pi Pico, using a GUI on a Raspberry Pi or a physical points switch frame connected by I2C.
This is part of my projects on building an indoor (OO Scale) and outdoor (G-Scale) model railway. This is intended for controlling up to 4 points on an indoor OO/HO model railway layout, although could be used for other model railways.
The main part of the project is a point controller board. This contains the capacitor discharge unit, a Raspberry Pi Pico Pico W with MOSFET switching circuits and a built-in regulated power supply for the Raspberry Pi PicoW.

Part of the schematic circuit diagram is shown below. Click on the image to download the full PDF showing the circuit diagram.

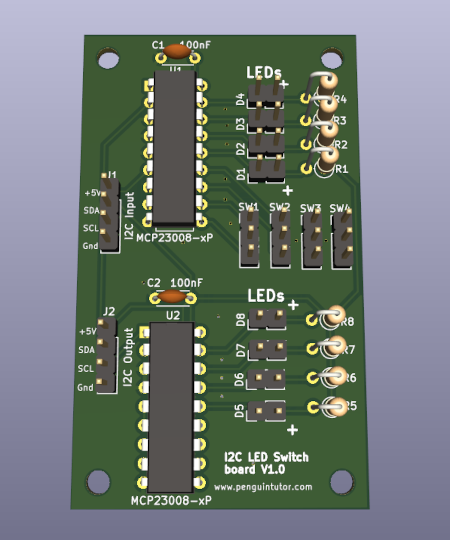
There is an external board which is used to read the values of the switches and to control multiple LED outputs. This is explained in the video below.
For more details of how this works see the description on the Electronics guide to I2C GPIO expander MCP23008.
A 3D image of the PCB is shown below.
The schematic circuit diagram is shown below. Click on the image to download the full PDF showing the circuit diagram.

One of the features of the point controller is a capacitor discharge unit. This uses capacitors to store a charge which can be used to apply a quick surge of current to the solenoids used in model railway point motors.
The video below explains the details of how this works.
For more details see: MOSFET Capacitor Discharge Unit project in my electronics pages.
The source code is available from Github.
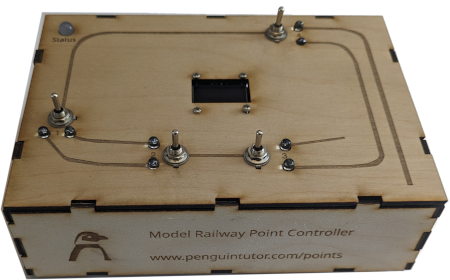
I have designed a wooden enclosure for laser cutting. This was designed using FreeCAD, Inkscape and LightBurn. It is based around a wooden box with interlocking sides, but rather than using existing workbenches in FreeCAD I had to design this manually. This is because of the sloping roof. On the page below I have a video which explains the design process including creating the main shape in FreeCAD before adding switch, LED and component holes in FreeCAD and Inkscape and etching including images and writing in Inkscape and LightBurn.
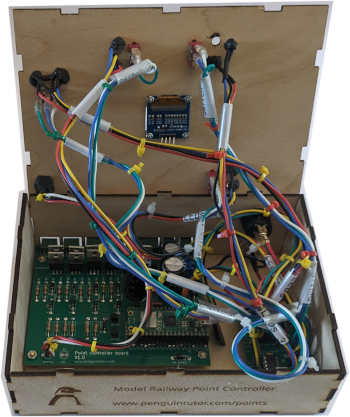
After completing some prototype testing, the PCBs have been designed and I've created a demonstration board. It didn't all go smoothly and the below video gives an insight into some of the issues and future direction for the project.
I'll be posting updates of the project on my PenguinTutor YouTube Channel.
Also see:
To see future updates please:
Subscribe to the PenguinTutor YouTube Channel
Please view the copyright information regarding use of the circuits.

